

As we all know, we are living in the digital era of social media where images and their quality are extremely important especially in business. If you want to make your products and services stand out from the rest, professional-quality imagery is a must-have. But not everyone can afford the price-tag that comes with hiring a professional photographer; nor can we get together in the way that we want to in order to get those photos done right.
Luckily, photography has come a long way in a very short period of time. The technological advances within the last few years have made it easy for anyone to become a photographer. Everyone has the capability of creating high-quality images with their cell phone or an inexpensive camera in order to boost their online presence and generate more sales!
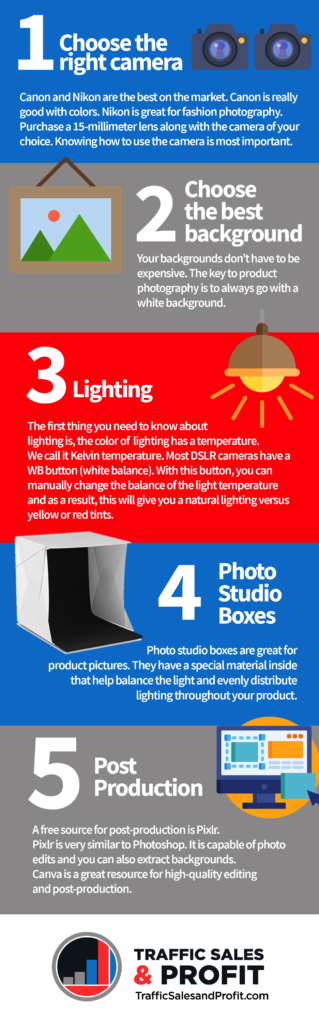
- 1. Choose the Right Camera
- 2. Choose the Best Background
- 3. Lighting
- 4. Photo Studio Boxes
- 5. Post Production
1. You Don’t NEED a Camera
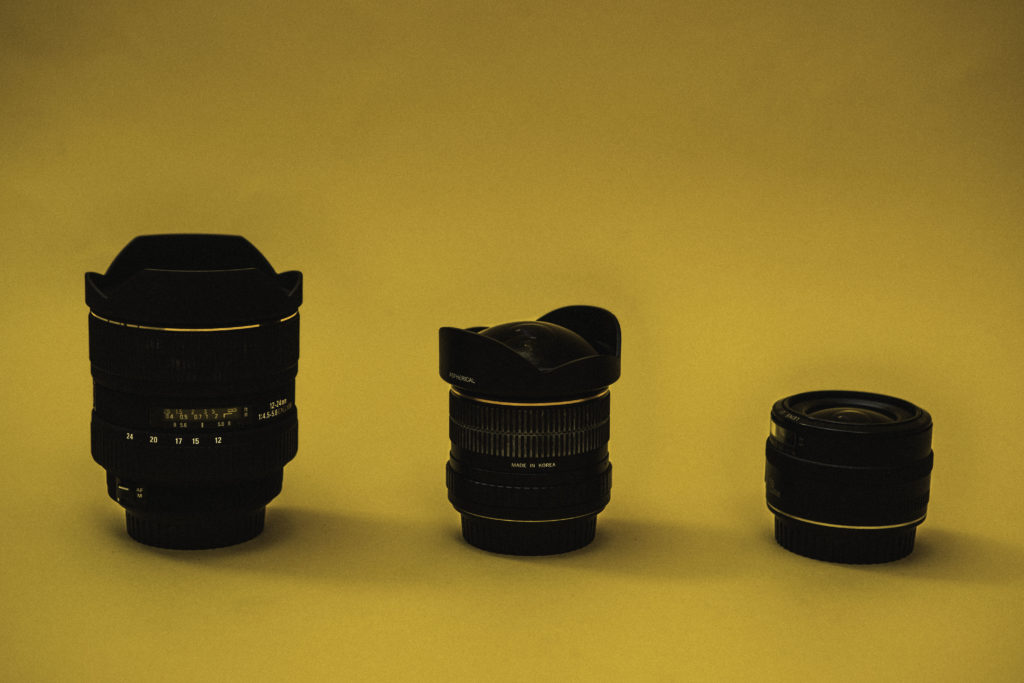
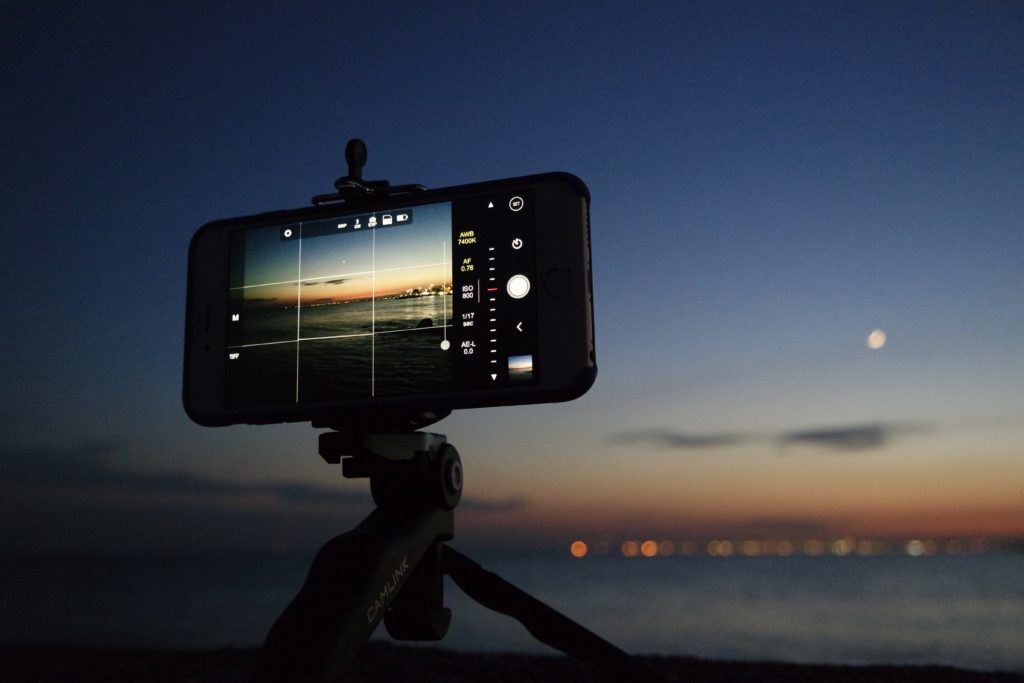
The first way to level up your photography is by choosing the right camera. A high-quality camera isn’t necessary. Cell phone cameras actually take very high-quality photos, but the key is understanding how to use it to maximize the look of your images. The difference between a cell phone camera and a DSLR (Digital Single Lens Reflex) is the ability to adjust features manually. However, now there are many free and paid apps you can get on your smartphone to make it on par with DSLR cameras!
You don’t need to break the bank with a DSLR for lenses either. They make camera lenses that, along with the types of apps mentioned above make your phone into a little camera powerhouse.
2. Choose the best background
Backgrounds are inexpensive. You can simply buy a paper background on Amazon. Position your background near a window or a sliding glass door to get some ambient light; Use a reflector to boost lighting. All of these items should cost around thirty dollars at the most.
A vital piece for product photography is using a white background. In addition to the white background, you can also buy a foam board from Hobby Lobby or Lowes and create your own DIY lightbox. We’ll talk more about the lightbox later, but foam board pieced together with some lighting gives you the nice balance that’s necessary to capture a well-rounded image for product photography.
3. Lighting
The first thing you need to know about lighting is, the color of lighting has a temperature called Kelvin temperature. When shooting, photographers typically say, “Oh, I need to check my white balance.” Or “I need to look at my white balance.” This is the heat of the actual light source.
For instance, if you see an orange or yellowish color in your pictures, the temperature of the light is very warm. There’s a button on a DSLR camera called a WB button. WB stands for white balance. With this button, you can manually change the temperature and balance of the lighting. This option isn’t available with a camera phone normally, but when you utilize one of the advanced camera apps we mentioned before, it usually unlocks the ability to adjust the phone’s internal white balance as well.
Still, if you’re taking pictures with your phone, you want to look for light bulbs that are around 5000 Kelvin. That’s the temperature that you’ll see on the actual packaging. When you shoot product photography look for LED lights that are 5000 or greater. This will give you a cool temperature and create perfect images with your phone’s native camera.
4. Photo Studio Boxes
Photo studio boxes are perfect for product photography. You may have an issue with larger items fitting inside the box but it is perfect for smaller products. Having a tripod is important when you’re using a photo box because it creates consistency in height and spacing. Standard photo studio boxes have lighting at the top and reflectors inside to help balance and evenly distribute lighting throughout your product.
5. Post Production
A lot of people ignore this final way to get high-quality images. Most think having a high-quality camera phone, high-quality camera, high-quality lens, nice background, and photo boxes will complete the job. This isn’t true.
You will need to spend time editing and polishing up your images. Any images that you see out there nowadays has gone through a post-production process that consists of removing spots or completely extracting the image from the original background.
A free source for post-production is Pixlr. This platform is very similar to Photoshop. You can edit your photos, extract the background, and polish it up. A second source would be Canva. Many of you are probably already using Canva. Canva is a great resource for high-quality editing.
Two more paid options are for Lightroom and Photoshop. Lightroom and Photoshop are probably two of the most industry-wide used post-production tools. They have both desktop and mobile versions so you can edit photos on the go once you get the hang of it.
We hope these tips are helpful to you. Let us know what photography tools you use with your phone below in the comments.
Check out Lamar’s interview with Milton Lawrence Jr. is a renowned International lifestyle photographer and cinematographer. He is also the founder of the game-changing Milton Lawrence creative agency, the go to solution for visual branding and storytelling.
Milton‘s uncanny skill to balance edge, culture and creativity in visual presentations has afforded him the opportunity to serve big brands and organizations including AT&T, CNN, the National Museum of American History, Yahoo and Visa. His work has also been featured in Essence, MunaLuchi Bride, The Knot, Black Enterprise and the Today Show.
Check out Milton’s Facebook group for more stellar mobile photography tips: https://www.facebook.com/groups/killerkontentpodcast/
For more tips and tricks on how to transform create content that crushes and helps drive more sales into your business, check out the TSP Blog!
Keep in touch with TSP by following and subscribing to our social media pages! Connect with us on Facebook, Instagram, and YouTube for countless tips, additional tools, and most importantly a supporting community.
TSP Facebook Group: https://bit.ly/35ybwKs
TSP Instagram: https://bit.ly/3diGclx
TSP YouTube Channel: https://bit.ly/2L6pzxg


i got a connection on photo inspection